In this blog, I'm going to show you how to install BlackArch Linux in VirtualBox/VMWare.
Open your VirtualBox application and click on create a new virtual machine from the main menu.
Assign a minimum 2GB ram minimum. Add hard-disk of at least 50GB.
Now boot the newly created VM and start the installation process.
First, select Boot Black arch Linux, and if you have Nvidia graphics then select Boot BlackArch Linux (nonfree).
First thing first you need to login in your new BlackArch live session.
The default username and password is root & blackarch.
Now after this open terminal and type first command #blackarch-install-
#blackarch-install
After that, you need to follow the instructions.
- Select the second option Install from black arch Live-ISO and hit enter.
- Now you need to select the output method quiet or verbose, here I'm selecting the second option verbose mode.
- Now select your locale settings, according to your locality, here I'm selecting "en_US.UTF-8".
- Select your keymap, I'm selecting 'us' keymap you can set yours according to you.
- Put a hostname in the next step.
- Now choose your drive to create partitions, if you want to dual boot your machine then you can choose this option but here I'm doing this on VM so I'm skipping this options.
- In the next step it will ask you to create partition manually here you have to select 'y' and create three partition root, boot, and swap.
- Make sure you are doing partition correct.
- After that proceed to the next step and wait for finishing this process.
- Now set a root password for your machine.
- If you want then you can add one guest user account, it totally depends on you right now I'm skipping this step.
- Select your timezone according to your region, here I'm selecting Asia/Kolkata.
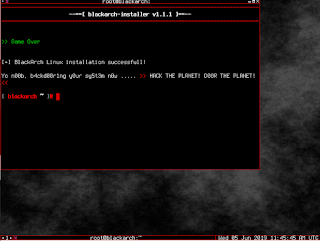
- Now you will get a screen like this now it's done remove your installation media and reboot your system.
It's done to enjoy your time with pen-testing.
If you have any doubts comment below or you can mail me-
johntheh4cker


Comments